This is quick summary how to build a sensor network with Udoo and a couple of ESP8266. It’s a project sketch, not a tutorial. To build something similar you have to be familiar with microcontrollers, sensors, MySQL, phpMyAdmin, Linux, Node.js and the Rest API. Installing and configuring Samba could also be useful.
One of the important border conditions for my project is, that the sensor network is independent of our WLAN router and internet connection, because we normally stop the router during the night and when not in use. To run a sensor network without internet connection is possible, if you configure the Udoo as a WLAN hotspot. Another of my requirements is that the data is managed locally and not transmitted to some external cloud platform.
After a pause of 3 years I came back to the Udoo (see my old articles about it in German). The Udoo is a microcontroller which combines features of an arduino with those of a raspberry pi. And the quad version is still one of the most performant microcontrollers out there. Unfortunately it is also one of the most expensive ones.
At the maker faire Zürich 2017 I discovered the ESP8266, which first was sold as a cheap WIFI module for the Arduino. But very soon people realised that the ESP8266 can be used as a microcontroller by itself. At the moment it is the way to go if you want to build inexpensive sensor networks based on WIFI.
The combination of a Udoo as a server with a couple of EXP8266 as sensor nodes is a pretty powerful combination. Although I puzzled it out by myself how to combine all those hardware components and linux packages and node modules, I had two sources, which helped me a lot. One is the weather station project of Daniel Eichhorn, which inspired the whole project and provided the code template for the ESP8266 programming. And the second one is the article „RESTful Api using node.js,Express and Mysql“ of Jinal Shah, which helped my to build a simple rest api for my sensor node. I want to thank them and all others, whose willingness to share their insight helped me to solve the arising challenges step by step.

Where it started: The weather station project based on an ESP8266
Hardware
- Udoo Quad with 12 Volt power supply
- an SD card (mine is 16 GB large)
- an old PC fan to cool the Udoo down (else it gets very hot)
- at least 1 ESP8266 as a sensor node
If you buy the weather station kit from Squix, you get not only an ESP8266 but also a DHT11 sensor and some jumpers. - 1 9V battery per ESP8266 to run the sensor node independent of the power grid
- at least 1 sensor, for example a DHT11 (combined temperature and humidity sensor)
- a couple of jumper cables and maybe a small breadboard
- if you have an old unused SATA harddisk with a SATA cable, you can even connect the Udoo to this harddisk. This is not necessary for the project, but nice to have if you want to collect a lot of data.
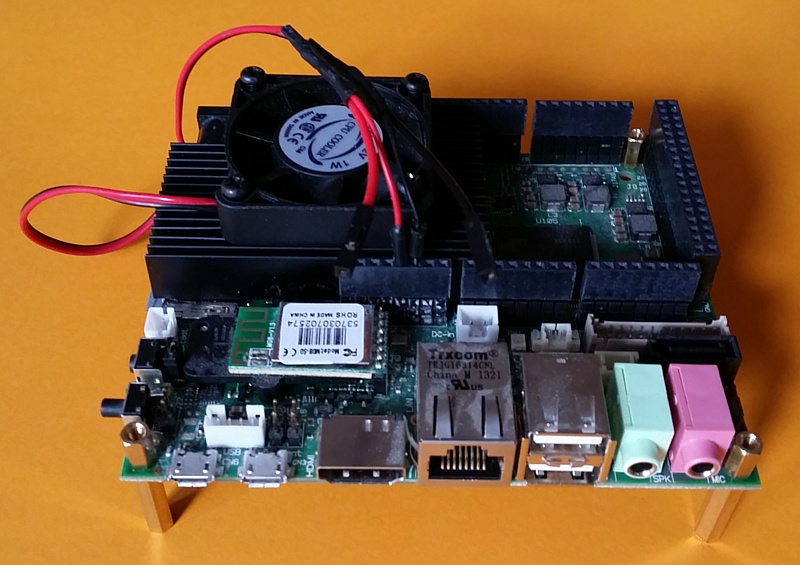
Udoo as autonomous server for a sensor network
Hardware for programming the Udoo
- A HDMI cable and a HDMI compatible screen (or an adapter for another screen)
- A USB mouse and USB keyboard
- An ethernet cable (this is essential, if you want to run the Udoo as a WLAN hotspot)
Hard- and Software for programming the ESP8266s
- A PC or a Mac
- The newest Arduino IDE with the library for the ESP8266
- A micro USB cable
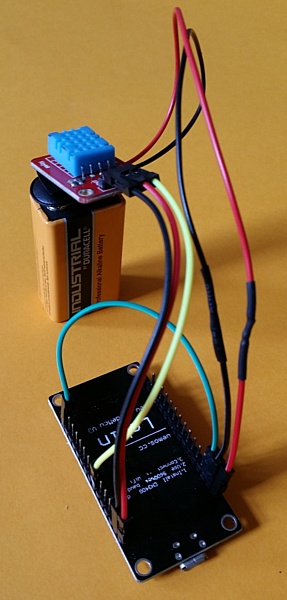
ESP8266 as a battery driven sensor node
Components of the sensor network
A Udoo as a server with the following features:
- Configured as a WLAN hotspot with softAP
- a MySQL database with the necessary tables to save the sensor data
- a Node.js-Application with a simple rest API to receive the sensor data and write it to the database
Steps for a solution
First you start with connecting and configuring the Udoo:
- Download the last version of UDOObuntu from the Udoo website and install it on your SD card.
- Put the SD card into the slot on the Udoo and connect it with mouse, screen and ethernet. Then connect the power supply.
- Install softAP on your Ubuntu and configure the Udoo as WLAN hotspot
- Install MySQL on your Udoo with
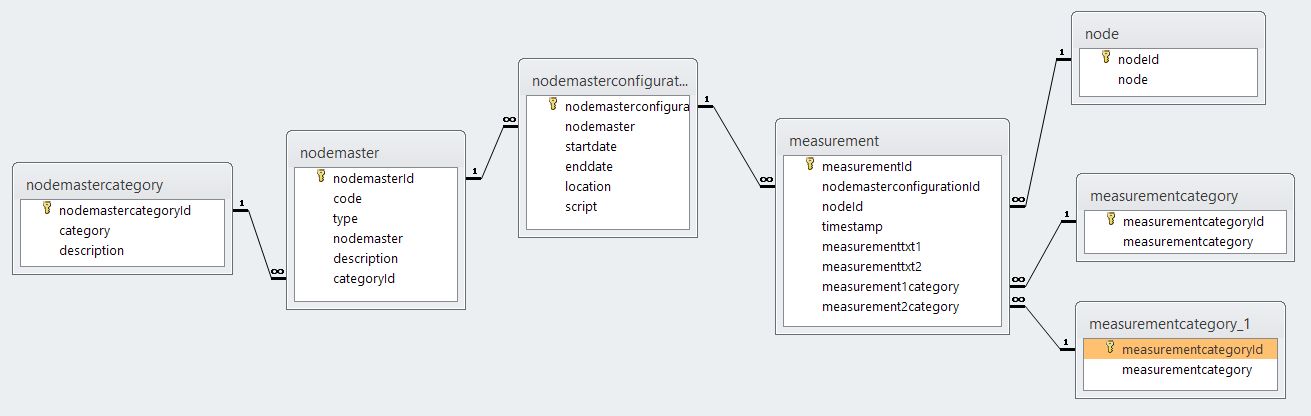
sudo apt-get install mysql-server - Create a db instance on MySQL with at least 1 table for the sensor data (my data model is a little bit more complicated, it has 6 tables)
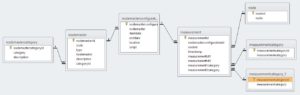
Database Model for a Sensor Network
- Install Node.js with Express and some other modules on your Udoo and download the REST example from Jinal Shah.
The explanations for Shahs project can be found in his article „RESTful Api using node.js,Express and Mysql“. - Change the configuration in this project in order to connect to your MySQL DB
- Write two new Node files (for example in a text editor like Leafpad) for your sensor data , one in the model folder for the database connection and one in the router folder to route the incoming request to your model. I took the task files in the project as a template for my code. Don’t forget to include the new router file in your app.js.
- If you are not happy writing code in a text editor on the Udoo you can install a samba server and share the project folder in your local network. Then you can open your favorite Javascript IDE on your PC or Mac and write your code more comfortably.
- Test the rest API via Ethernet and from a smartphone or a tablet via WLAN (different IP address)
For the next steps you change to your PC or Mac and to the ESP8266:
- Download the latest Arduino IDE if you don’t have it already and configure it with the libraries ESP8266WiFi and DHT
- Download the code for the DHT11 sensor from the weather station project of Daniel Eichhorn (the man behind SQUIX).
- Connect the DHT11 sensor to the ESP8266 as shown in the weatherstation project and then connect the ESP8266 to your PC or Mac.
- Change the script so, that it connects to your on WLAN hotspot and that it writes to your Rest Api instead of the Thingspeak platform. Include the deepSleep command if you want to run the sensor node with a battery (my sensor node only wakes up every 15 minutes to send the new data).
- Upload the code to your ESP8266 and test with the serial monitor and a web browser, whether the data is written to your database.
- Remove the ESP8266 from your PC or Mac and connect it to the battery.
- Test your application by querying the database via rest api
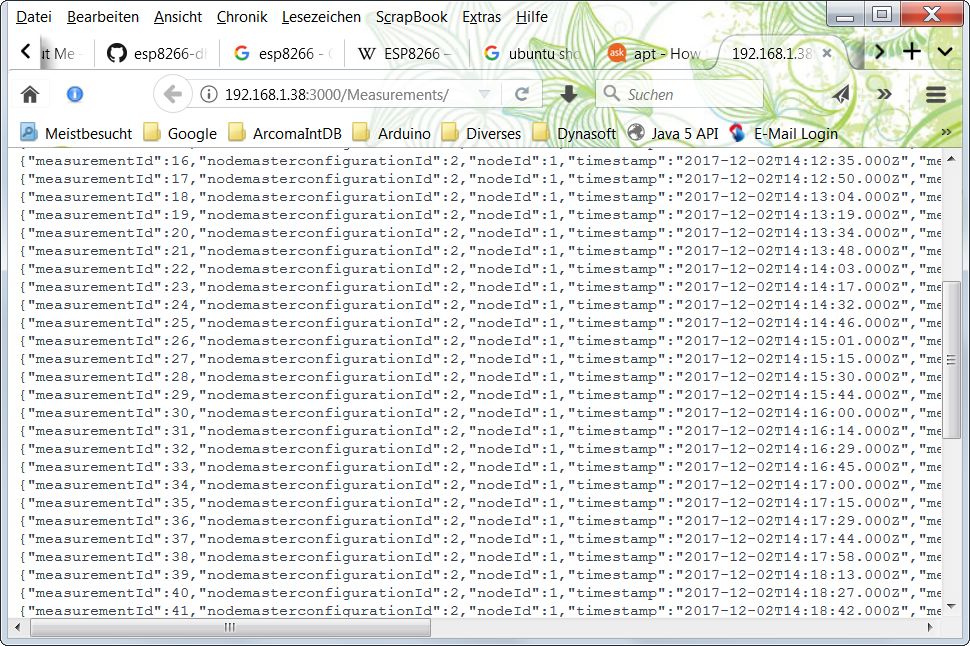
Querying a simple rest api with a browser
Configuring VNC
If the Udoo is to run standalone without internet connection and screen, it has to be accessed somehow, else it cannot be stopped or controlled. The new Linux image contains already x11vnc as a vnc server. You can start it manually in the console with
x11vnc -forever
The -forever is necessary, because without it, the first client stops the vnc server when disconnecting.
As clients I use an Android handy and a tablet with the app „VNC Viewer for Android„. First you have to connect your WLAN to the Udoo hotspot instead of your normal WLAN. Then it is important to configure the VNC viewer for scaling „Zoomable“ in the menu „More“, else you cannot use the touchscreen.
Running MySQL without Internet connection
The last step for an autonomous sensor node server without internet connection is to bind your MYSQL database to all IP addresses instead of a specific one. This is necessary because there are two different IP adresses depending on whether the Udoo is connected by ethernet or it is running as an autonomous WLAN hotspot.
The trick is done in the file /etc/mysql/my.cnf. Change the line with the bind configuration in this way:
bind-address = 0.0.0.0
The next steps
- Solving the problem with the wrong time
Manually setting date in console: sudo date -s „12 Dec 2017 20:25:00“ - Adding SSL if possible
- Evaluation of Blynk: running a local blynk server on the udoo?
- Adding more sensor nodes
 Download des Artikels als PDF File
Leave a Reply